ユーザーの詳細情報はWP のユーザー プロフィール ビューで表示、編集、管理できます。
[ユーザー > ユーザー一覧] に移動し、編集、表示、または管理するユーザーを選択します。そうすると選択したユーザーのプロフィールビューが表示されます。ネイティブのWP フィールドはすべて画面の上部に表示されます。 カスタムのWP-Members フィールドはページの下の「WP-Members 追加フィールド」という見出しの下にあります。(見出しは wpmem_admin_profile_heading でフィルタリングできます)。
WooCommerce も使用している場合、WP-Membersのフィールドのうち WooCommerce のフィールドと共有しているものはユーザープロフィールの WooCommerce の項目に表示されるため、WP-Members の項目には表示されないので注意してください。
メンバーシップ機能を有効にしている場合、利用可能な会員資格が WP-Membersフィールドのすぐ下に表示されます。ユーザーの会員資格を有効または無効にしたり、有効期限を設定したりできます (有効期限のある会員資格の場合)。
原文を見る
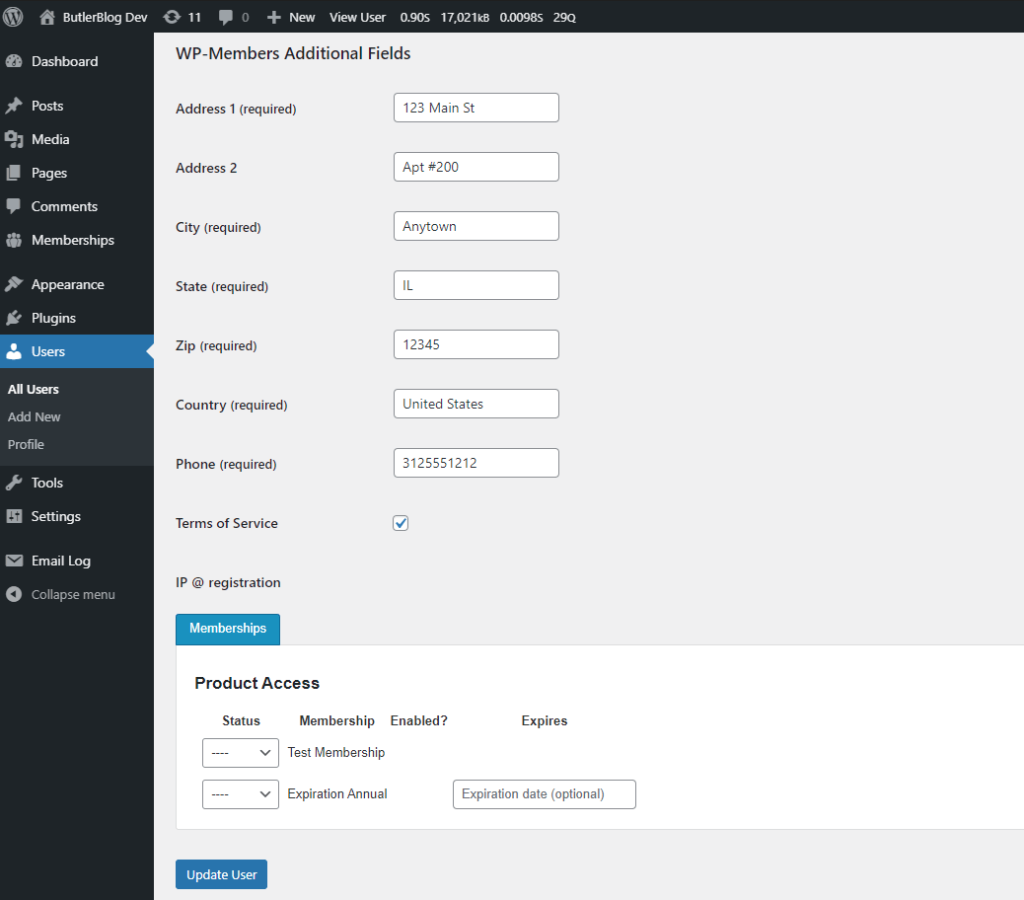
User details can be viewed, edited, and managed in WP’s user profile view.
Go to Users > All Users and select the user you wish to edit, view, or manage. This will bring up the profile view. Any native WP fields for the user will be at the top of the screen. Custom WP-Members fields will be down the page under the heading “WP-Members Additional Fields” (the heading can be filtered with wpmem_admin_profile_heading).
Note that if you are also using WooCommerce, WP-Members will skip any native WooCommerce fields that are part of the WP-Members form since those will also be displayed in the WooCommerce sections of the user profile.
If you have Memberships enabled, available memberships will be displayed just below the WP-Members fields. You can enable or disable a membership for a user, as well as set its expiration date (if it is an expiration membership).
https://rocketgeek.com/plugins/wp-members/docs/managing-users/edit-users/